Practice Routines
Practice is needed to maintain one's skill level, but it is possible to overdo things to the point that it becomes detrimental--especially with dry firing. I have always tried to get at least one 50 round range session per month plus a weekly dry fire session. The following are some suggested practice sessions for both live and dry fire. All strings should begin with your firearm in a condition of normal carry. Start signal for live and dry fire should be random. Click here for safety guidelines for dry fire practice.
For these courses you will need: 50 rd of pistol ammo (1 box); 60 rd of rifle ammo (3 20-rd boxes); and 5 5-rd boxes of buckshot and 1 5- rd box of slug.
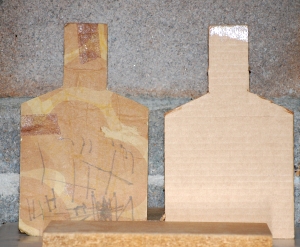
For dry fire practice using "standard" (18 x 30) targets simply make reduced targets for practice at short ranges. Use some brown cardboard and cut out a 6" x 9" target. Place it against a safe back drop, use feet for yards, and practice away.
| Pistol Range Drills | ||||||
| Range (Yd) |
Targets |
Drill |
Time | Repetitions | Stage Rounds |
Total Rounds |
| 1 | 1 | Fire 2 rounds | 1.2 | 2 | 4 | 4 |
| 3 | 2 - 3' apart at a15 deg angle | Fire 2 rounds at each target | 2.5 | 2 | 8 | 12 |
| 5 | 1 | Fire 2 rounds, examine, fire 1 round at head | 2 for first 2 shots | 2 | 6 | 18 |
| 7 | 1 | Fire 2 rds | 1.5 | 2 | 4 | 22 |
| 10 | 3 - 3' apart | 2-2-2 reload 2-2-2 | <=10 | 1 | 12 | 34 |
| 10 | 2 - 5' apart | Fire 2 rd at each target, using left, right, and 180 pivot | 3 | 1 | 12 | 46 |
| 25 | 1 | Fire 1 rd | 2.5 | 4 | 4 | 50 |
|
Optional Long Range Stages |
||||||
| 50 | 1 | Fire 1 rd | 3 | 5 | 5 | 5 |
| 100 | 1 | Fire 1 rd | 5 | 5 | 5 | 10 |
PISTOL DRY FIRE
Things to remember
The grip being the most important part of the draw, it should be broken down into segments
Once we have that down, then we can proceed.
Most training organizations teach the draw as a 4 or 5 step process, which combine several movements into a step. In fact there is a whole lot more going on. The steps below break the draw into it's actual individual components and are designed to take you through the drawing process. We start out with distinct steps to learn the process and evolve into one smooth stroke where we are not conscious of the steps.
Grip - You obtain your strong hand firing grip on your pistol in your holster. This grip does not change. Trigger finger is straight.
Clear - Pistol is lifted clear of the holster. Trigger finger remains straight.
Pivot - Pistol is pivoted so the muzzle points toward the target. Pistol is just above the holster
Click - Safety is removed (autos)
Smack - Support hand grips the pistol
Punch - Pistol is moved to eye level, finger goes into trigger guard
Look - Sight alignment is verified with a flash sight picture
Press - Trigger is pressed
Thus we work through the following steps.
Grip. Clear. Pivot. Click. Smack. Punch. Look. Press.
Grip. Clear. Pivot. Smack. Punch. Look. Press.
Grip. Clear. Smack. Punch. Look. Press.
Grip. Clear. Smack. Punch. Press.
Grip. Clear. Punch. Press.
Grip, Clear. Press
DRAW!
As practice continues the steps start to blend together (ie: In the second sequence the pivot and the release of the safety blend into one step. In the third step the clear, pivot, and safety release blend into one step, etc.) and eventually the process and thought train just becomes "draw" and when done right you can actually look at a target, close your eyes, draw, and when you open your eye the sights will be aligned.
When practicing the draw DO NOT rush the speed. Work for smoothness and economy of motion. Speed will come naturally. If you have no real experience in drawing start with an empty pistol until the motions are imprinted on your muscles.
Dry Fire Practice Drills
Draw, sight, snap, and scan - 10 repetitions
Pivot, draw, sight, snap, and scan - 10 each from L, R, and 180
Draw, sight, snap, and scan, tac reload, and point in - 10 repetitions
Draw, sight, snap, and scan, speed load, and point in - 10 repetitions
Pay particular attention to smoothness and economy of motion and to achieving a proper sight picture at the end of the draw stroke. (Ideally, you want to be able to look at the target, close your eyes, draw, and then open your eyes and have the sights aligned on the target.) Work on keeping sights on target during trigger reset. Remember to scan area (including behind you) at the completion of each individual drill.
| Rifle Range Drills | ||||||
| Range (Yd) |
Targets |
Drill |
Time | Repetitions | Stage Rounds |
Total Rounds |
| 5 | 1 | Fire 2 rounds | 1.5 | 4 | 8 | 8 |
| 7 | 1 | Fire 1 rounds at head of target | 1.5 | 4 | 4 | 12 |
| 10 | 2 | Fire 2 rounds at each target | 2 | 2 | 8 | 20 |
| 25 | 1 | Snap shot - Fire 1 round at head of target | 1.5 | 5 | 5 | 25 |
| 50 | 1 | Snap shot - Fire 2 round at body of target | 2 | 4 | 8 | 33 |
| 50 | 3 - 3' apart | Fire 2 round at each target | 5 | 2 | 12 | 45 |
| 100 | 1 | Fire 5 round at body of target off hand* | 2.5 | 5 | 5 | 50 |
| 200 | 1 | Fire 5 rd at body of target - any position* | 3.5 | 5 | 5 | 55 |
| 300 | 1 | Fire 5 rd at body of target - any position* | 5 | 5 | 5 | 60 |
| * If
using a detachable magazine rifle swap magazines after the first
round. |
||||||
While designed for "homeland defense carbines" and 2, 30 rd magazines, this drill can be used for manually operated rifles with more generous time limits. rifles. Start all strings with the rifle cocked and locked from either a slung or ready position, and engage safety after each string.
RIFLE DRY FIRE
Things to remember
Practice Drills
Mount, sight, snap, and scan - 10 repetitions starting with butt on waist
Mount, sight, snap, and scan - 10 repetitions starting with rifle slung (either on shoulder or
in a tactical carry)
Starting with rifle pointed at target, sight, snap, and scan, tac reload, and point in - 10 repetitions
Starting with rifle pointed at target, sight, snap, and scan, speed load, and point in - 10 repetitions
Pay particular attention to smoothness and economy of motion and to achieving a proper sight picture at the end of the mount. (Ideally, you want to be able to look at the target, close your eyes, mount, and then open your eyes and have the sights aligned on the target.) Work on keeping sights on target during trigger reset. Remember to scan area (including behind you) at the completion of each individual drill.
| Shotgun Range Drills | ||||||
| Range (Yd) |
Targets |
Drill |
Time | Repetitions | Stage Rounds |
Total Rounds |
| 5 | 1 | Fire 1 round | 1.5 | 5 | 5 buck | 5 |
| 7 | 1 | Fire 1 round | 1.5 | 5 | 5 buck | 10 |
| 10 | 3 - 3' apart | Fire 1 round at each target | 3.5 | 2 | 6 buck | 16 |
| 25 | 1 | Fire 1 round | 2.5 | 6 | 6 buck | 22 |
| 15 &50 | 2 | Fire 1 round @15, select slug and 1 round @ 50 | 5 | 3 | 3 buck/3 slug | 28 |
| 100 | 1 | Using slug fire 1 round | 3 | 2 | 2 slug | 30 |
| Requires 25 buckshot and 5 slug | ||||||
SHOTGUN DRY FIRE
Things to remember
Practice Drills
Mount, sight, snap, and scan - 10 repetitions starting with butt on waist
Mount, sight, snap, and scan - 10 repetitions starting slung (either on shoulder or in a
tactical carry)
Starting aimed at target, sight, snap, select slug, sight, snap, and scan - 10 repetitions
Pay particular attention to smoothness and economy of motion and to achieving a proper sight picture at the end of the mount. (Ideally, you want to be able to look at the target, close your eyes, mount, and then open your eyes and have the sights aligned on the target.) Work on keeping sights on target during trigger reset. Remember to scan area (including behind you) at the completion of each individual drill.
Please email comments to Fr. Frog by clicking here.
![]()
Updated 2013-12-07